Asset Publisher
WMS service management
CartoDruid allows you to configure layers that query WMS services.
You will be able to build a catalog of services that you will use to add Raster layers to your project.
Índice
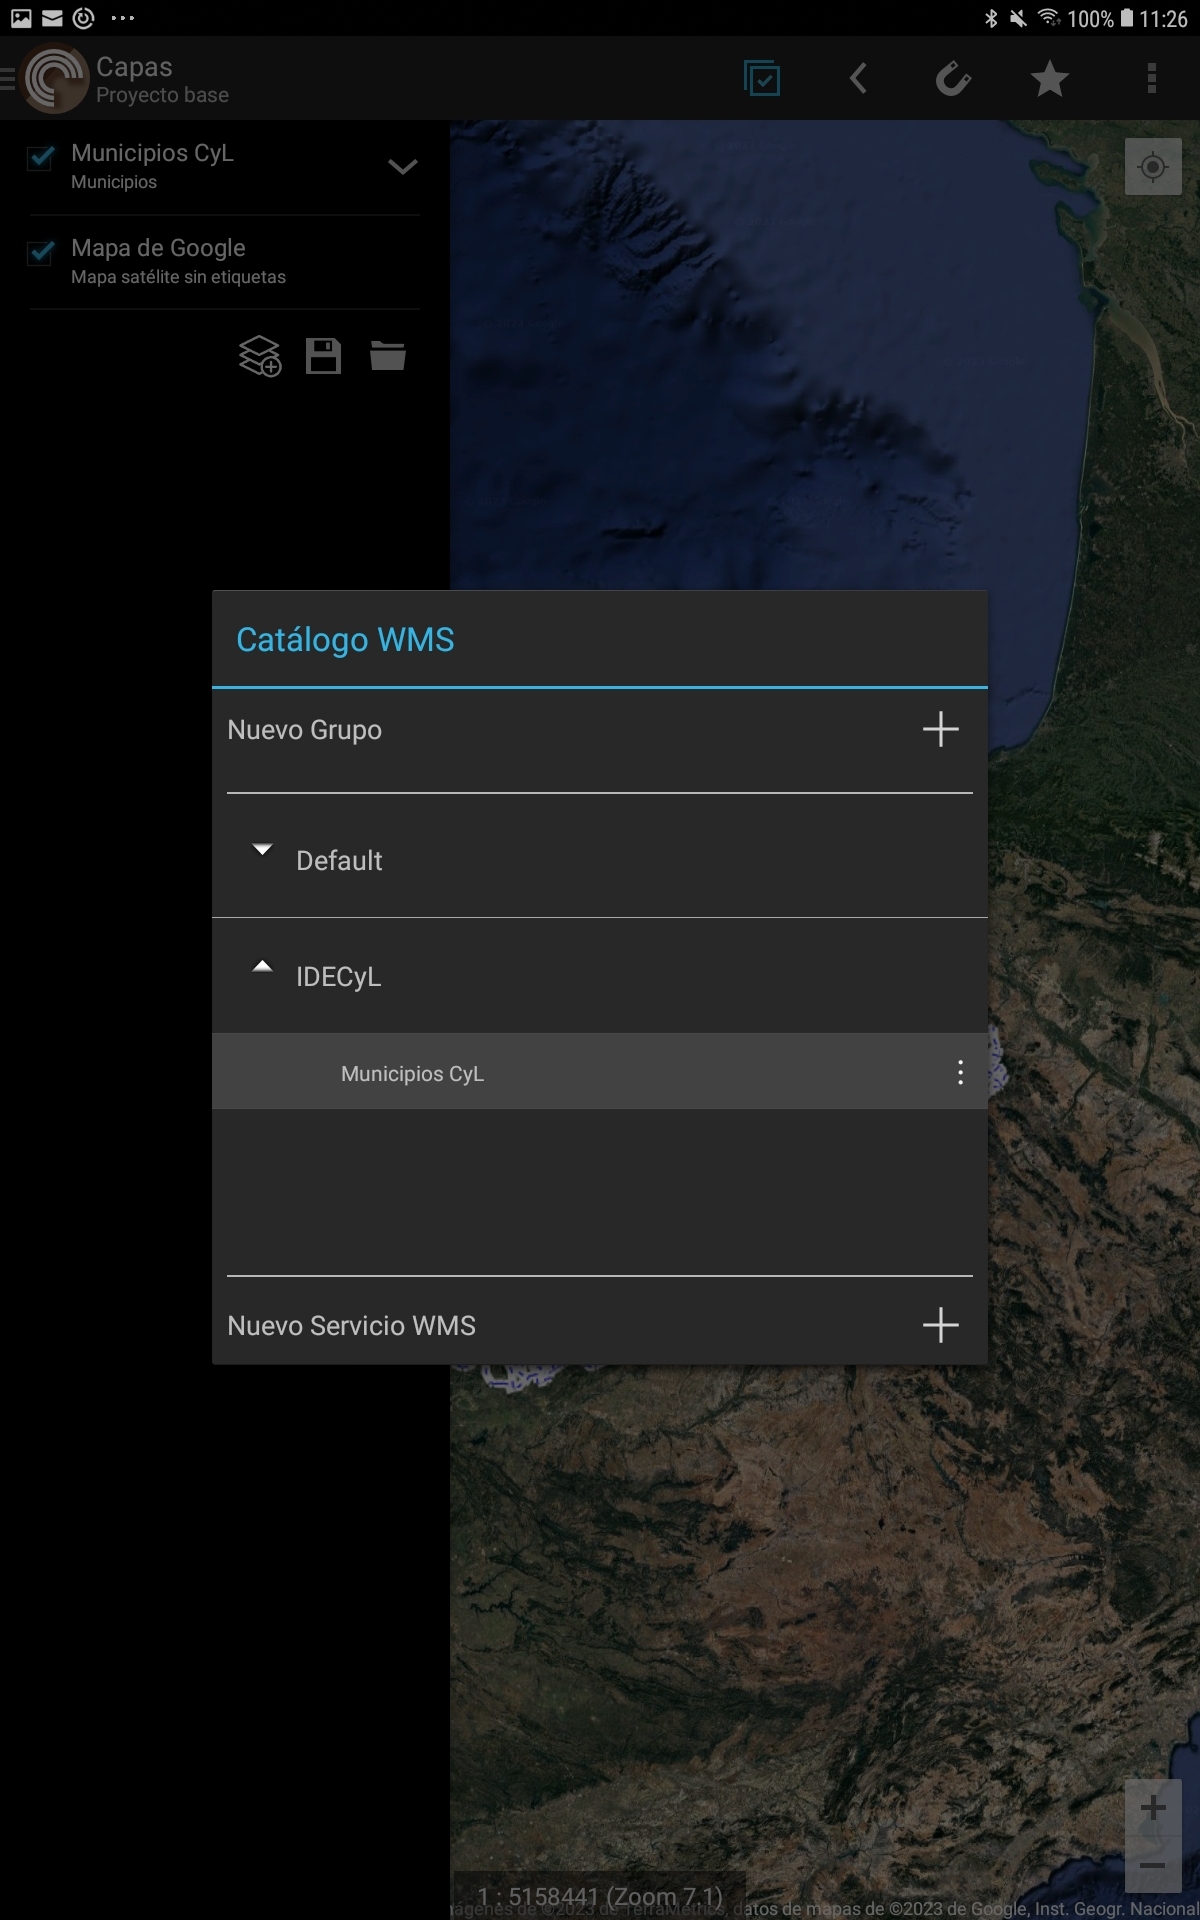
WMS Catalog
To access the WMS catalog of our project, we will perform the following actions:
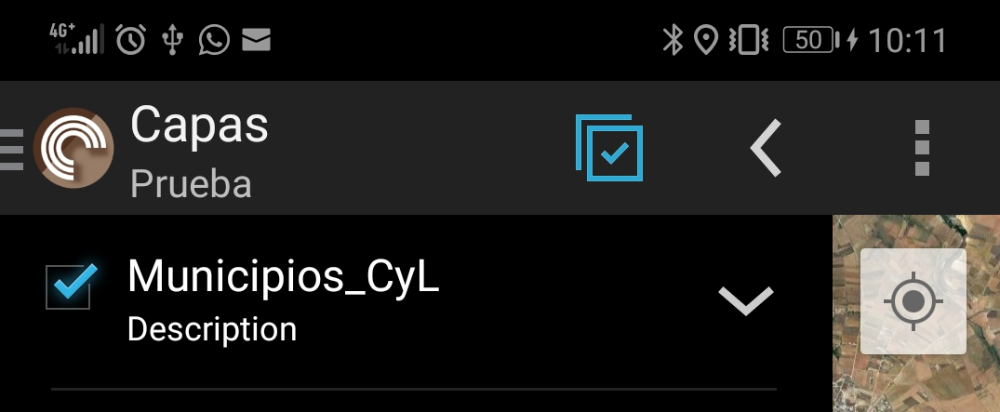
- We display the table of contents (TOC) of the application by clicking on the CartoDruid icon and click on the add layer button that is in the lower left corner of the TOC.
- Select the option «Raster Layer».
- Select the option «WMS Layer».


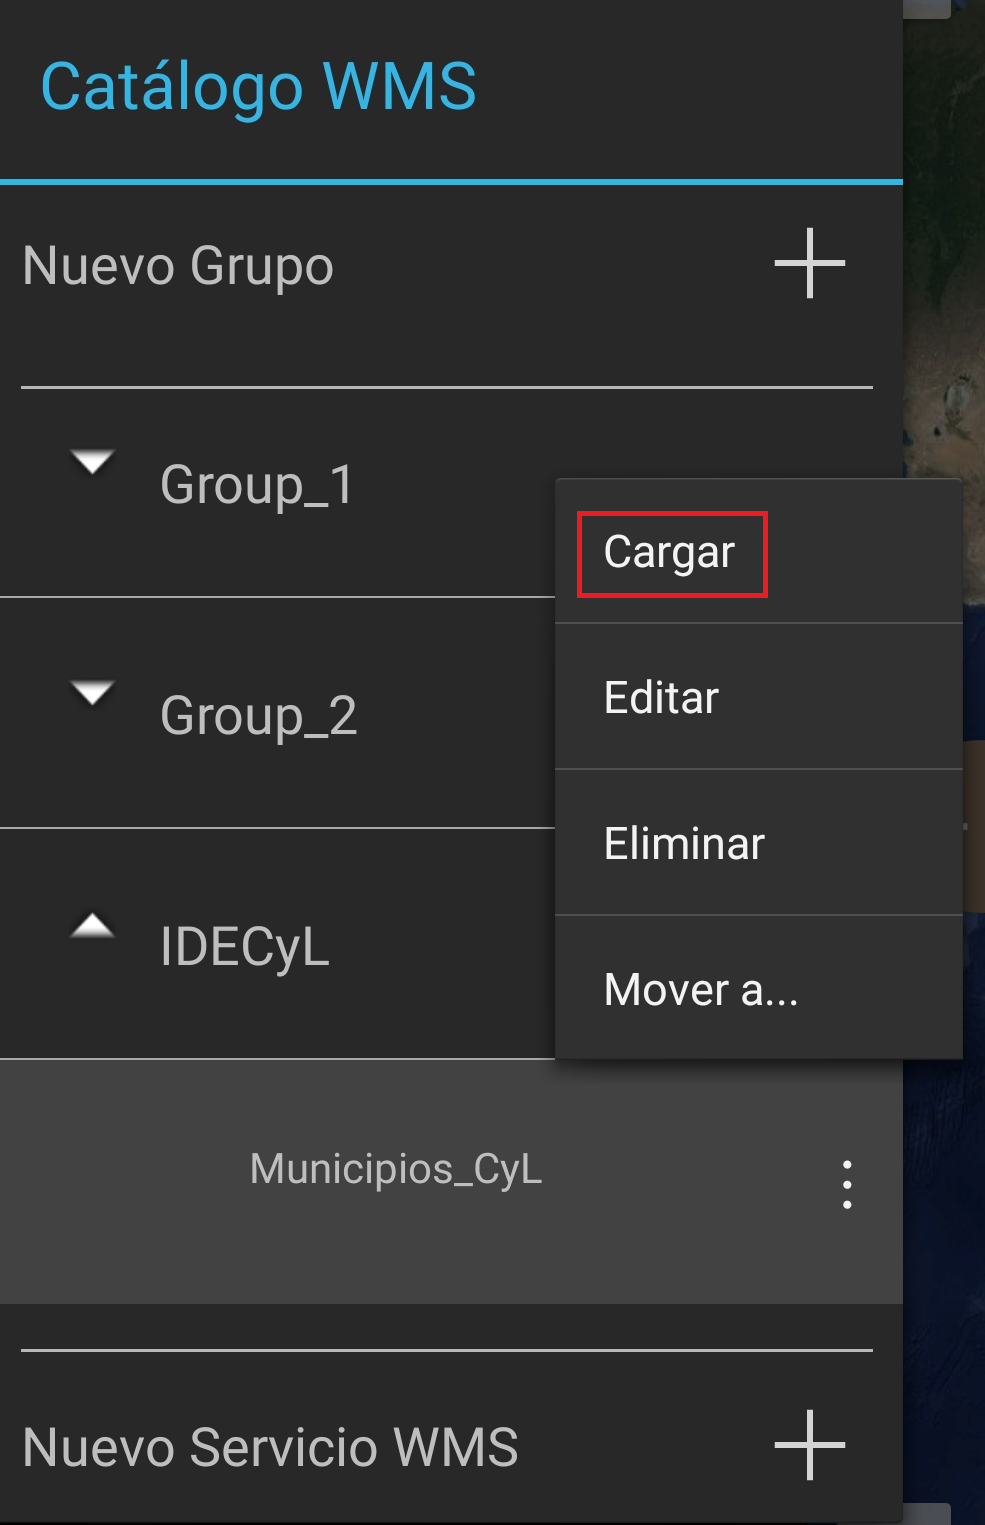
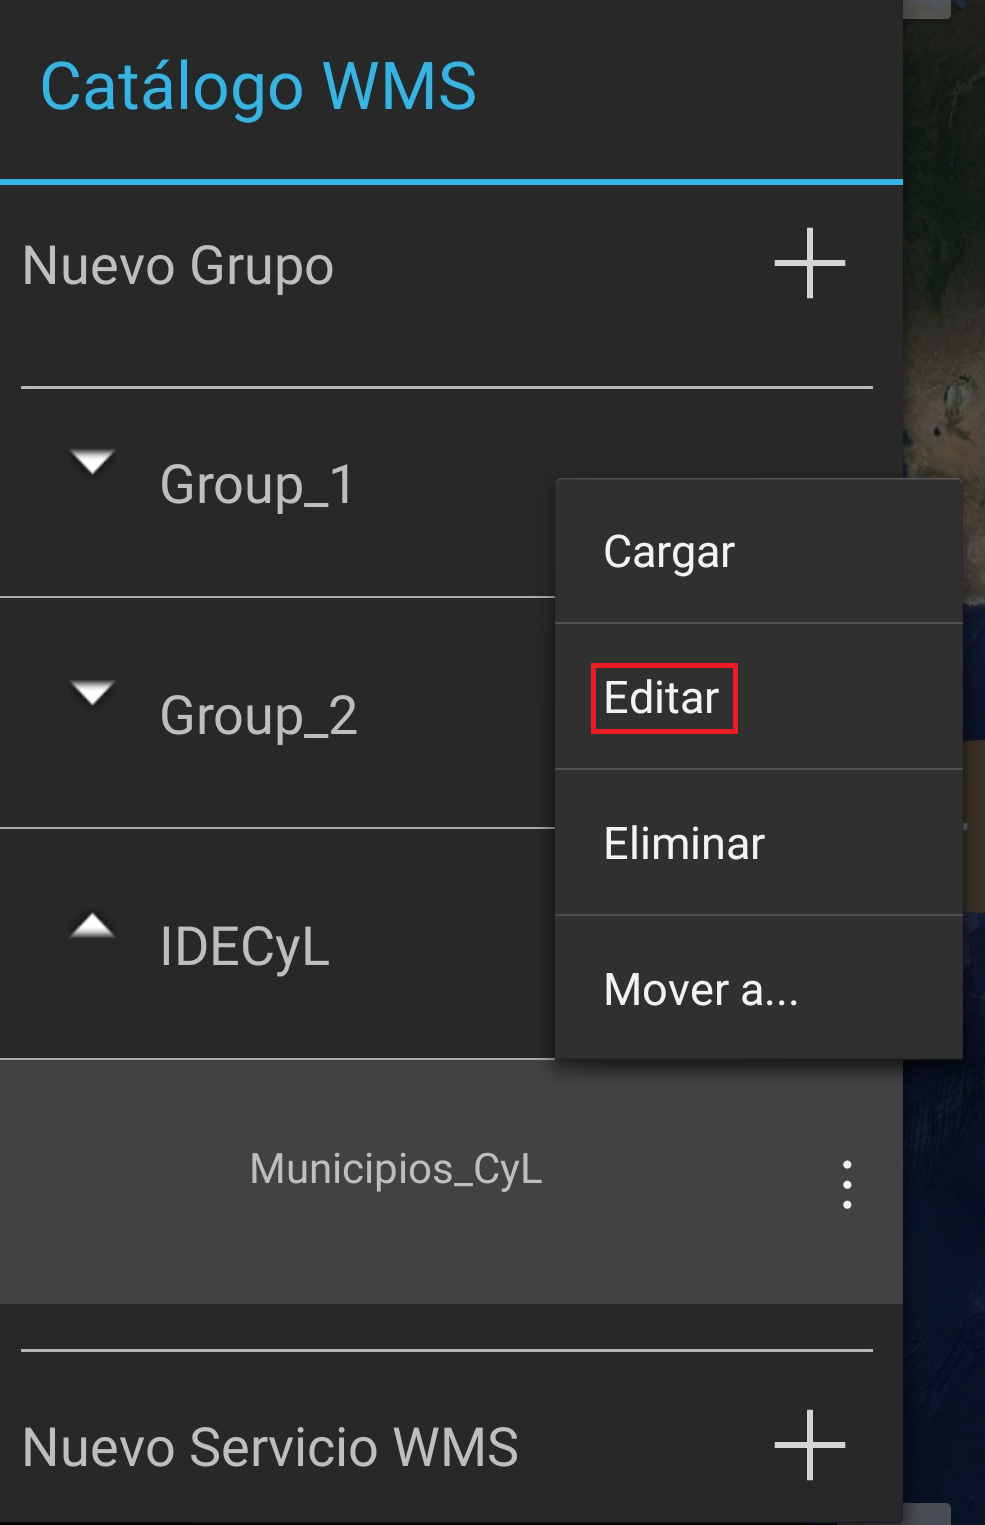
The actions that we can perform on the WMS catalog will be:
- Create a New Group that we will use to group different services.
- Create a New WMS Service.
- Actions of each service:
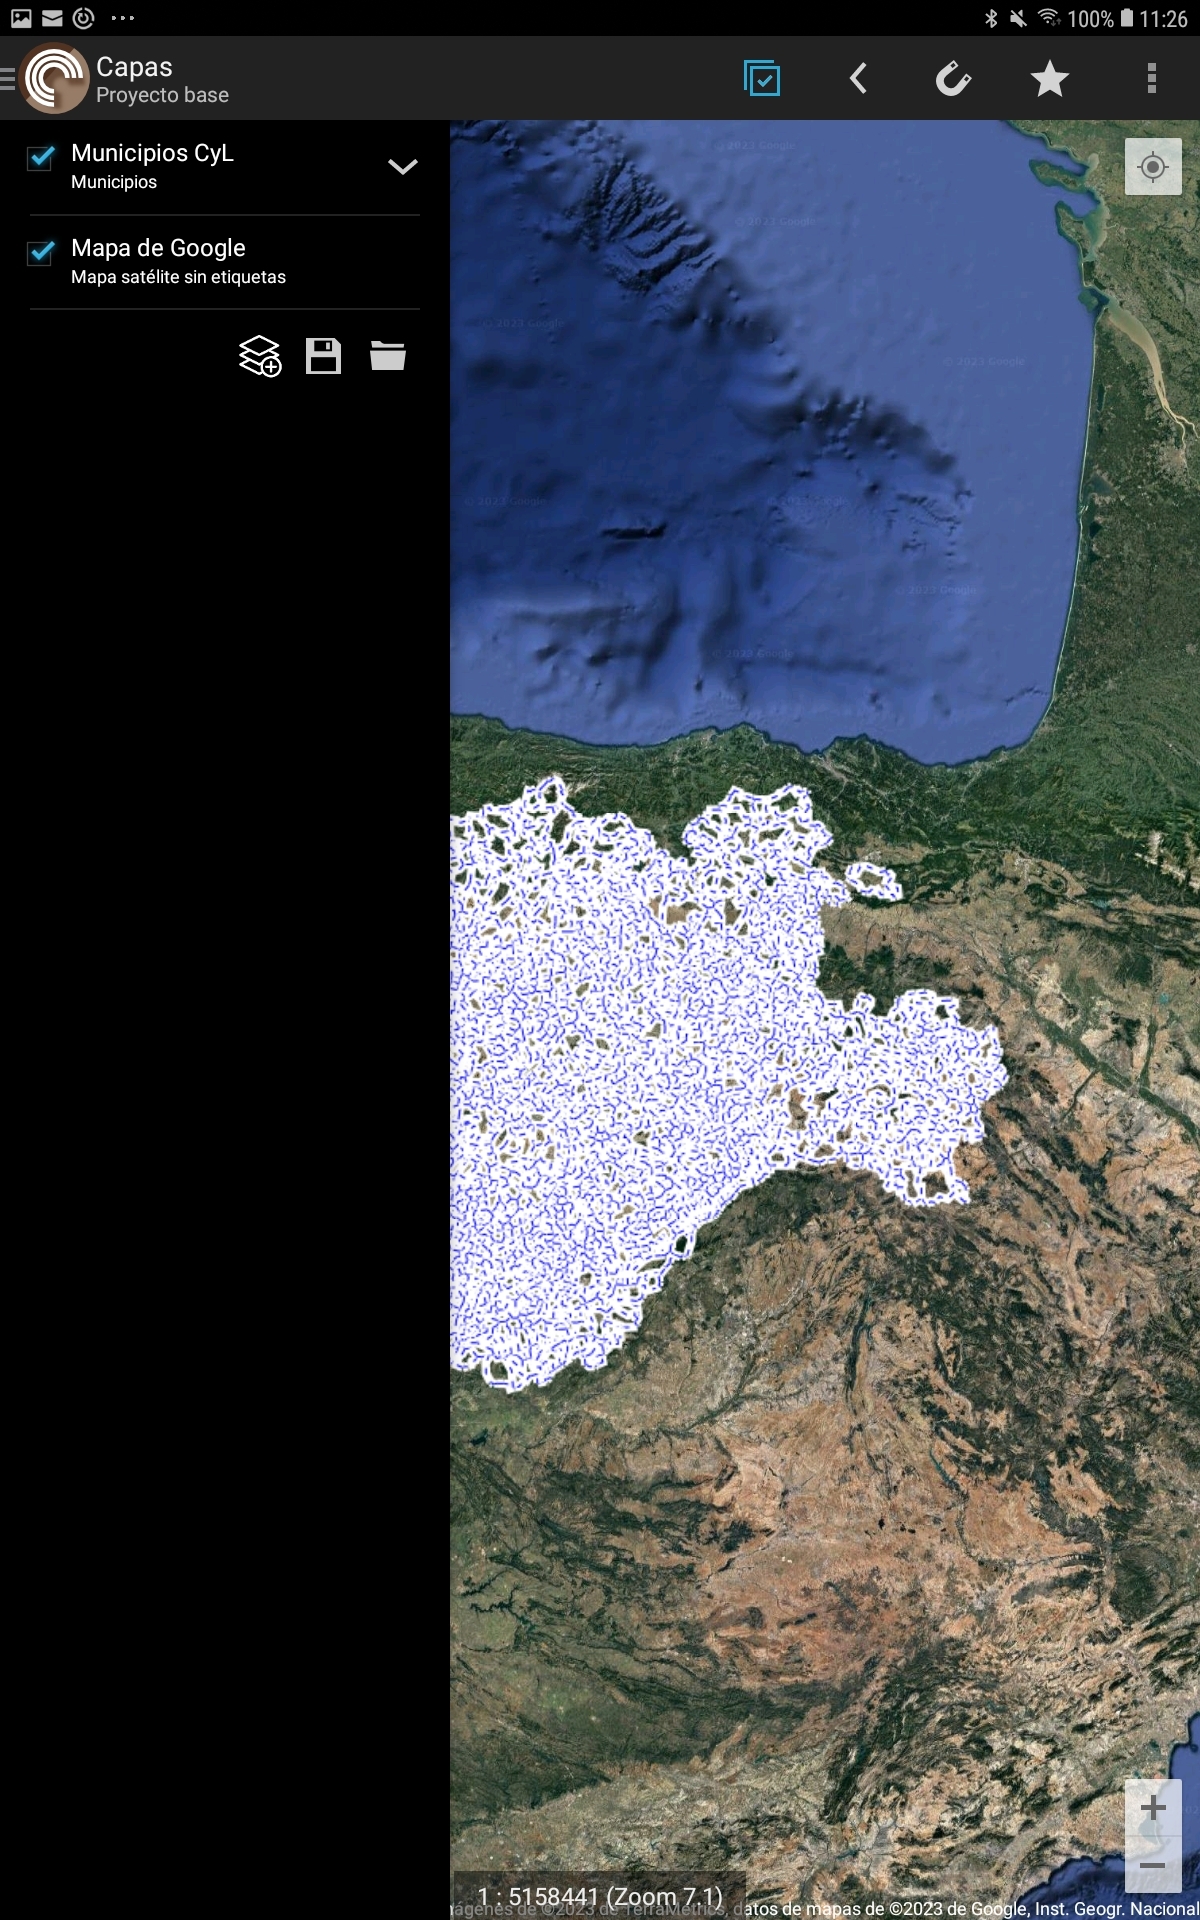
- Load: It will add a raster layer to your project with the data resulting from the request to the WMS service.
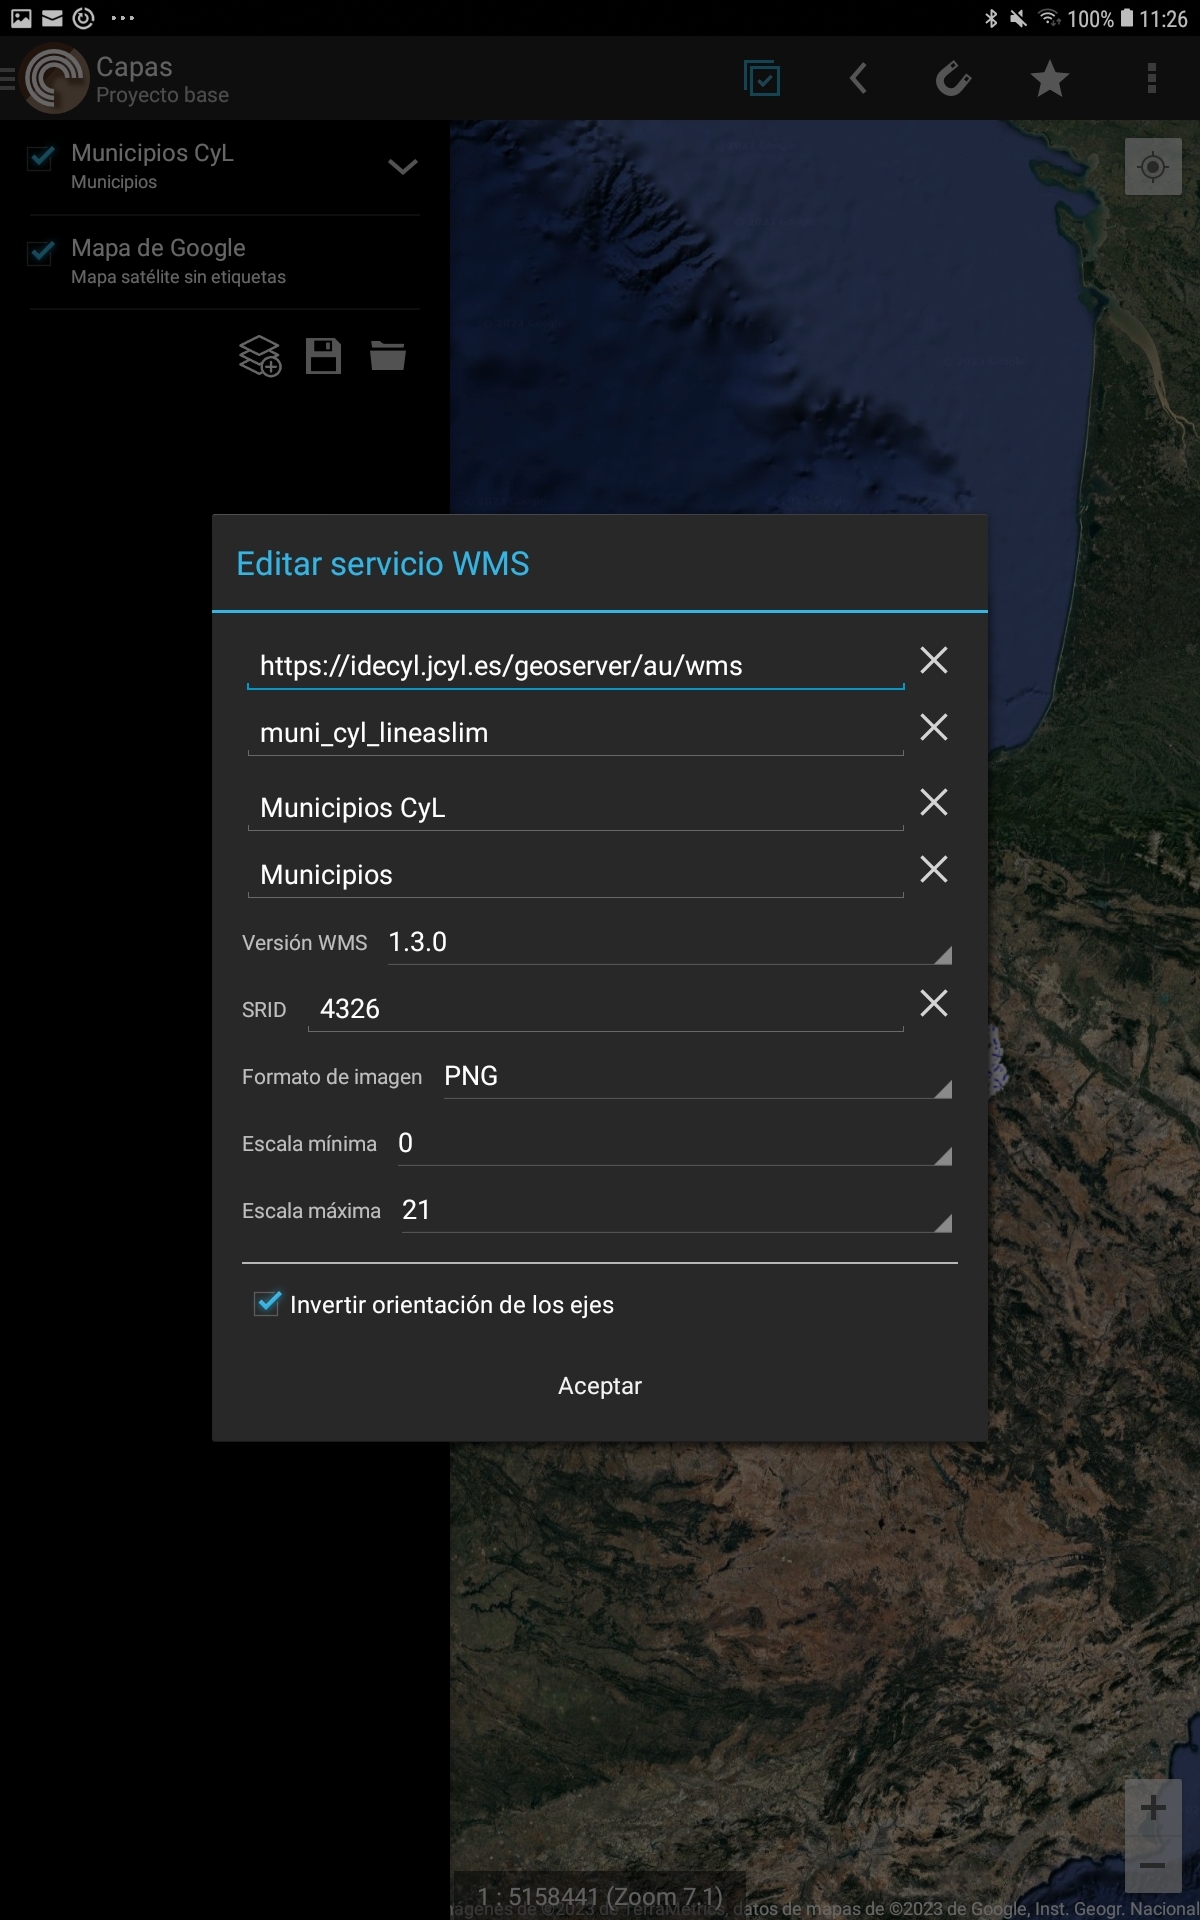
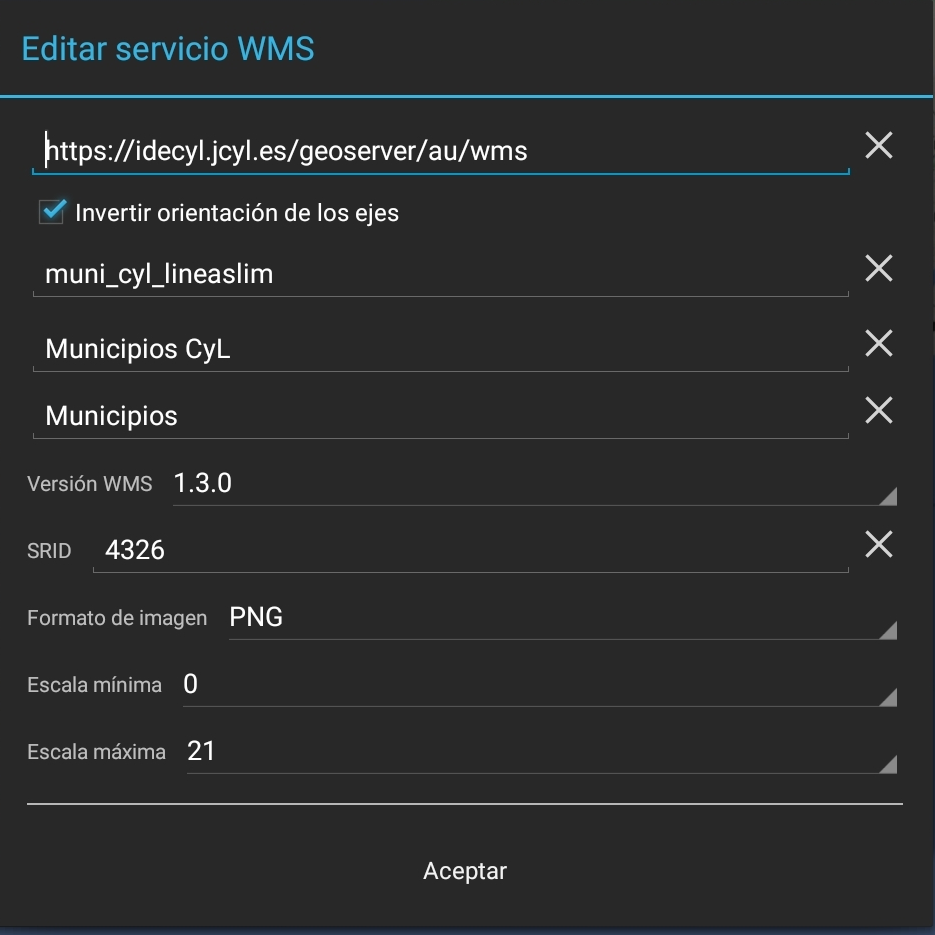
- Edit: It will open a dialog where you can modify the parameters of the WMS request.
 >
>
- Delete: It will delete the WMS service from our catalog.

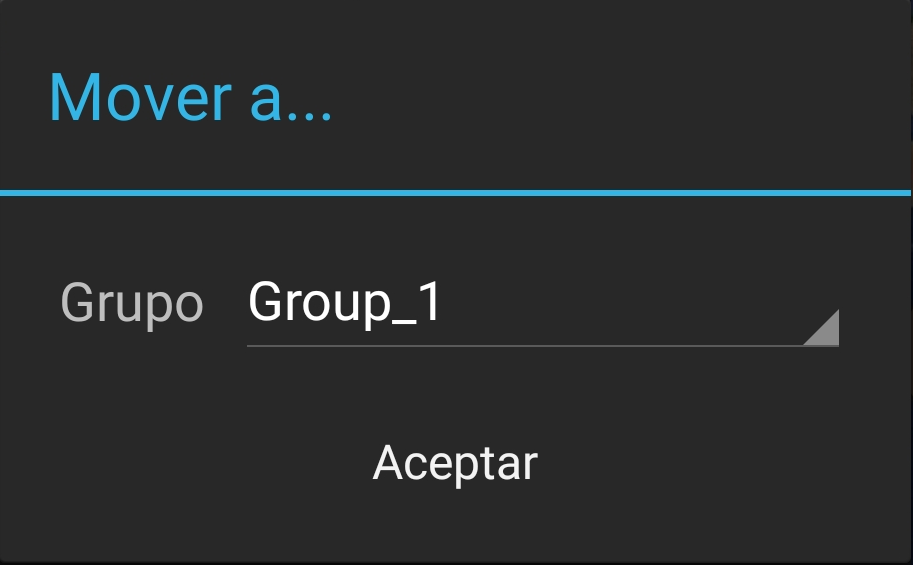
- Move to: It will move the WMS service to another group in the catalog.

- Load: It will add a raster layer to your project with the data resulting from the request to the WMS service.


WMS Group
Clicking on the icon 

We introduce the name of the new group and press accept to return to the «WMS Catalog» screen with the new group created.
New WMS Service
Clicking on the icon 
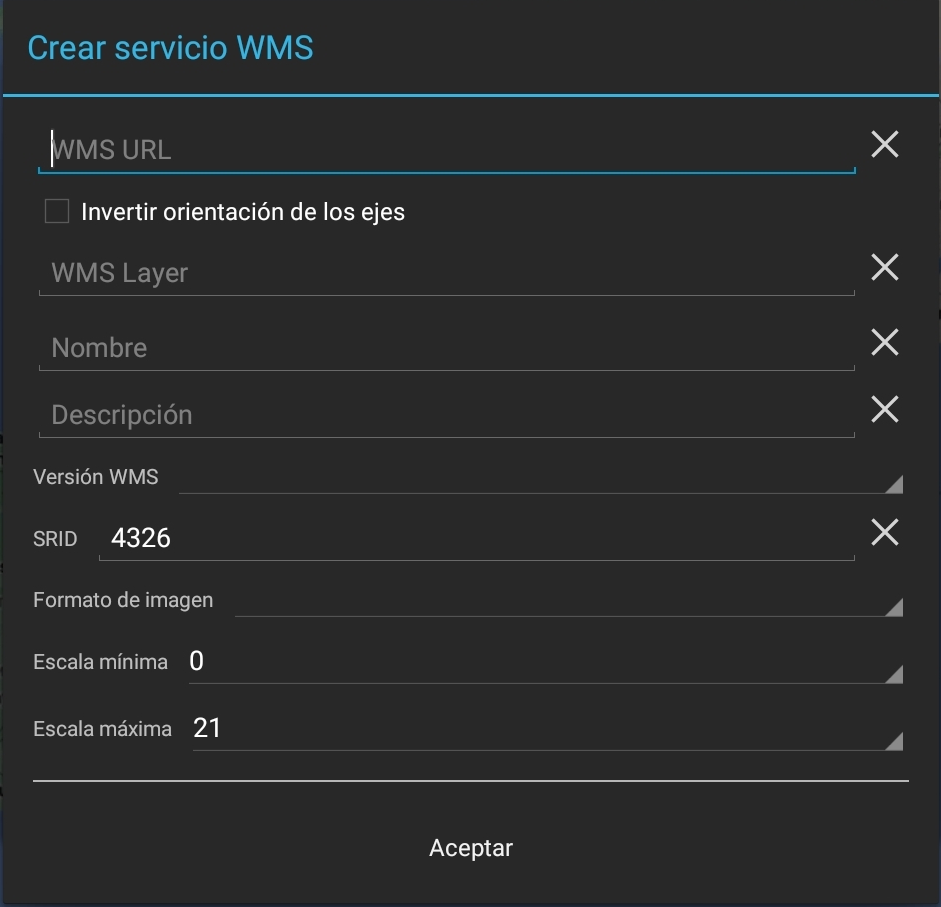
We introduce the parameters of the WMS request: name, description, path to the on-line service,... We press accept to return to the «WMS Catalog» screen with the new service added to the Default group. At this point we will be asked if we want to add the layer to the TOC. From the option Move to ... of the service we will move it to the group to which the service will belong.
Manual configuration WMS Catalog
For each project that we have configured in CartoDruid, there will be a wmsRepository.«project_id».json file in the cartodroid/config / folder. This file stores the WMS catalog defined and configured for the project.
By default with the CartoDruid installation a wmsRepository.json file is included without content to work with the basic project.
If you have a list of WMS that you want to use in your project, you can configure it by hand by modifying said file.
An example of this file:
[
  {
    "group": "Default",
    "type": "",
    "url": "",
    "name": "",
    "description": "",
    "rangeMin": "",
    "rangeMax": "",
    "invertAxisOrientation": "N"
  },
  {
    "group": "IDECyL",
    "type": "WMS",
    "url": "https://idecyl.jcyl.es/geoserver/au/wms",
    "layerName": "muni_cyl_lineaslim",
    "name": "Municipios CyL",
    "description": "Municipios",
    "versionWMS": "1.3.0",
    "srid": "4326",
    "imageType": "PNG",
    "rangeMin": "0",
    "rangeMax": "21",
    "invertAxisOrientation": "Y"
  }
]
- group: Name of the group to which the service belongs.
- type: Type or version of wms to use. At the moment WMS.
- url: Route to online service.
- layerName: LAYERS parameter of the WMS request indicating the layer to consult.
- name: Name of the layer to display in the TOC (table of contents).
- description: Description of the layer to show in the TOC.
- versionWMS: Versión WMS.
- srid: Reference system to use in the layer.
- imageType: Image format. Possible values: PNG or JPG
- rangeMin: Minimum zoom level at which the layer will be visible.
- rangeMax: Maximum zoom level at which the layer will be visible.
- invertAxisOrientation: Invert axis orientation.